Use this mini classroom mailbox template in a variety of ways.
DIY Classroom Mailbox
This mini mailbox template can be used in a variety of ways! Use it as a whole class positivity initiative, an individual rewards system, an advanced look at nets of 3D objects and many more.
Print the Color template on an A3 sheet, and assemble a ‘not so mini’ postbox for the whole class. Students post their positive letters and messages to their peers. The teacher acts as the delivery person by checking the mail, stamping it and delivering it to the individual students.
Individual Student Postboxes
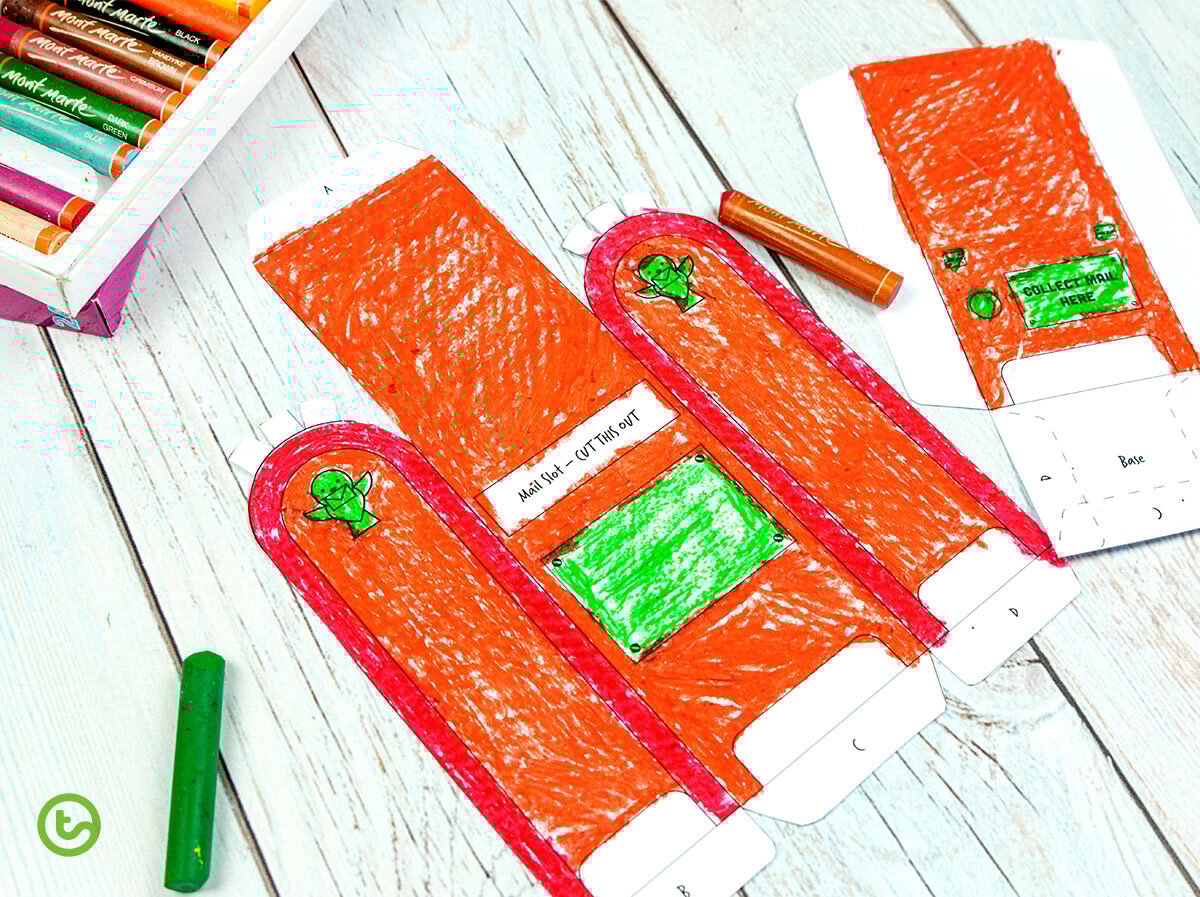
Provide students with the black-and-white option to color and add their names to the front of the mailbox. The mailboxes can be placed on each student’s desk or together in one location. The teacher can deliver written notes to each student that can be read out during “mail time.”
At-Home Mailbox
Use the Mini Mailbox at home to deliver messages or rewards vouchers. Print and assemble multiple templates and use them as part of imaginative play. Children become delivery persons; they sort through the mail and then deliver to the correct address (e.g. 123 Cupboard Under the Sink, Kitchen 4321).
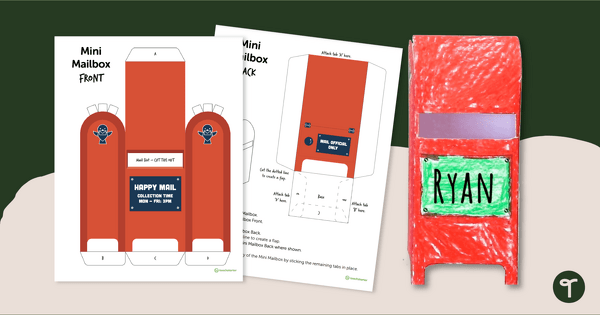
How to Build Your DIY Mailbox
- Cut out the Mini Mailbox front and back templates.
- Then, cut out the mail slot on the front template.
- You will notice a dotted line on the back template – cut along this to create a flap.
- Attach tab “A” to the Mini Mailbox back where shown.
- Fold all other tabs.
- Complete the assembly of the Mini Mailbox by sticking the remaining tabs in place.

Classroom Mailboxes
Print the color or black and white version and assemble the student mailbox for your classroom — you can use cardstock and back it with cardboard for a sturdier mailbox! Students drop positive letters and messages to their peers in the class mailbox. The teacher acts as the delivery person by checking the mail and delivering it to the individual students. Or why not have a weekly Postal Worker class job and have an individual deliver the mail each morning?
Individual Student Mailbox
Provide students with the blank black and white mailbox version to color and add their names to the front of the mailbox. The printable mailboxes can be placed on each student’s desk or together in one location. The teacher can deliver written notes to each student that can be read at “mail time” during your class meeting time.
Use the drop-down menu to choose between the color, black and white, or blank versions.
This resource works nicely with our mini letter and envelope templates.


0 Comments
Write a review to help other teachers and parents like yourself. If you'd like to request a change to this resource, or report an error, select the corresponding tab above.